
Format Factory Settings Explained: GPU Acceleration, Bitrate & Quality
Format Factory's settings are split across two places — the app-wide Options screen and a per-file output configuration dialog — and it's not always obvious which controls what. Here's every one we confirmed by hand.
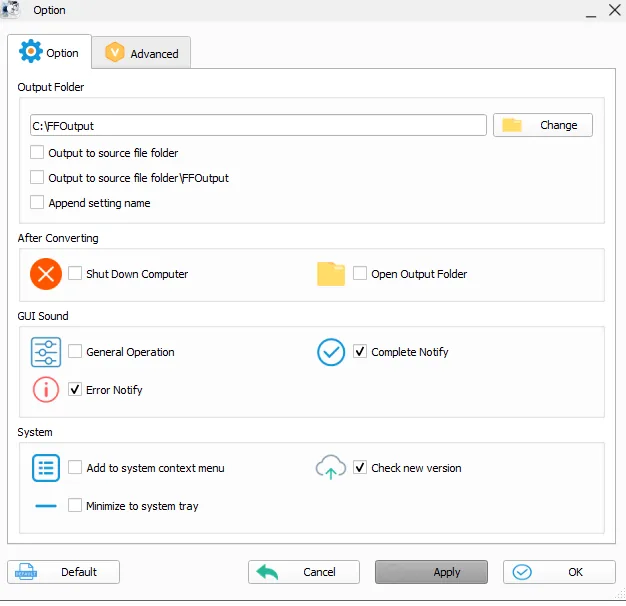
Turning on GPU / hardware acceleration
Options → Advanced includes a GPU field with Auto Detect and a dedicated HA Test button — running it checks your specific CPU/GPU (Intel Quick Sync, NVIDIA NVENC, AMD) for which encoders it can actually accelerate. Our own test install showed a splash-screen warning that Intel QSV H264 wasn't supported on that particular machine, confirming the check runs automatically at startup too, not just when you request it.
Use Multi-Threads
Also under Options → Advanced, this setting ranges from 1 to 12 and defaults to 8 in our tested install. Higher values speed up conversion on capable hardware but can overwhelm lower-end CPUs — if the app feels sluggish or unresponsive during large batches, lowering this is one of the more effective fixes.
Bitrate & quality settings
Opening a file's destination configuration dialog ("Configurar Destino") exposes the real per-conversion controls: Size Limit, Video Codec, Video Size (resolution), Bitrate, CRF/CQ, GPU selection, FPS, Aspect ratio, two-pass encoding, keyframe interval, deinterlacing, rotation, and horizontal/vertical flip — all confirmed present and functional in our own testing. For images specifically, JPG and WebP quality controls default to 90 out of 100, adjustable in the same style of dialog.
The practical relationship worth understanding: bitrate controls file size and quality together — higher bitrate means larger files and better quality, up to the point of diminishing returns for the source material. CRF/CQ (constant rate factor/quality) instead targets a consistent visual quality level and lets the file size vary scene to scene, which many people find gives more predictable results than picking a bitrate by guesswork.
Custom output profiles
We didn't find a dedicated, named preset-saving system in our testing — no explicit "save as profile" button in the destination configuration dialog. What we did confirm is that the dialog remembers your most recent settings for a given output format, so setting your preferred bitrate and quality once and reusing the same format button on subsequent conversions carries those settings forward without needing to reconfigure from scratch each time.
Codec-specific settings
Which specific codec options appear depends on your target format — MP4 and MKV outputs expose the widest range, including access to the newer VVC (H.266) encoder added when the engine updated to FFmpeg 7.1, alongside HEVC, VP9, and AV1 support that extended to FLV output in the same update. Image formats expose quality sliders instead of codec choices, since JPG and WebP don't have the same container/codec split that video formats do.
Common settings questions
What's a safe default if I don't want to tweak anything?
The out-of-the-box defaults (auto-detected GPU, 8 threads, quality 90 for images) are sensible for most everyday use — we only recommend adjusting them once you hit a specific problem, like a file that's too large or a conversion that's too slow.
Do settings reset after an update?
We didn't observe Options-level settings resetting after installing an update over an existing install in our testing, though per-file destination settings are naturally file-specific and won't carry over to a brand-new file you haven't configured yet.
Why does HA Test say a codec isn't supported?
That means your specific CPU or GPU generation doesn't include hardware acceleration for that codec — software encoding still works, just slower. It's a hardware limitation the app is reporting honestly, not something a setting elsewhere can override.
Deinterlacing, aspect ratio, and keyframes
A few settings in the destination configuration dialog matter mostly for specific source material. Deinterlacing fixes the horizontal-line artifacts common in older analog video captures or DVD rips — leave it off for footage that's already progressive-scan, since applying it unnecessarily can soften an otherwise clean image. Aspect ratio controls let you correct footage that looks stretched or squeezed from a mismatched source. Keyframe interval affects how often the video can be seek-jumped to precisely; a shorter interval improves seeking accuracy at a small cost to compression efficiency.
Fade in/out and video filters
The output settings dialog includes basic fade-in and fade-out controls, letting a clip open or close smoothly rather than cutting abruptly — a small touch that matters more than it sounds for anything you're sharing rather than just archiving. A general filter option is also present for additional visual adjustments, alongside rotate and horizontal/vertical flip for correcting orientation on footage shot in the wrong direction.
The short version
Two levels of settings: app-wide Options (GPU, threads, output folder) and per-file output configuration (bitrate, codec, resolution, crop, watermark, subtitles). Run HA Test before assuming a hardware feature works, and don't touch defaults until you hit a specific problem worth solving.
Settings won't fix a hardware limitation
It's worth being clear about what settings can and can't do: they control how a conversion runs, not what your hardware is physically capable of. If HA Test reports no acceleration for a given codec, no combination of bitrate or thread-count adjustments will change that — software encoding is simply slower on that specific machine, and the only real fix is either accepting the slower speed or converting to a codec your hardware does accelerate.
Where to start
Run HA Test once after installing, leave everything else at default, and only dig into bitrate, CRF, or thread-count adjustments once you have a specific goal — a smaller file, faster conversion, or higher quality — that the defaults aren't meeting.
Screenshot your settings before a big change
Before experimenting with an unfamiliar setting on a batch that matters, a quick screenshot of the current configuration makes it trivial to revert if the new settings don't turn out the way you expected.