How to Use Format Factory: A Beginner's Guide
If you've just installed Format Factory and aren't sure where to start, this is the plain walkthrough — what the interface looks like, how to run your first conversion, and how to convert several files at once.
The interface, laid out
The top menu bar reads TAREA (Task) · PIEL (Skin) · IDIOMA (Language) · OPCIONES (Options) · AYUDA (Help) in our test install, translated automatically based on your Windows display language — it came up fully in Spanish on a Spanish-language Windows system without any manual setup. The left panel lists categories: Video, Audio, Image, Document, Device (ROM/DVD/CD/ISO), and Utilities.
Format buttons, not menus
Unlike software that asks you to pick a format from a dropdown, Format Factory shows a grid of specific output buttons within each category — "→MP4", "→JPG", "→MP3", and so on. Clicking one opens a file picker for that specific conversion, which makes the whole interface effectively self-documenting once you know what you're looking for.
Your first conversion
Open Format Factory and pick a category in the left panel — Video, Audio, Image, Document, Device (ROM/DVD/CD/ISO), or Utilities.
Click the specific output format button within that category, like "→MP4" or "→JPG".
Click "Add File" (or drag files into the window) to select what you want to convert — one file or several at once.
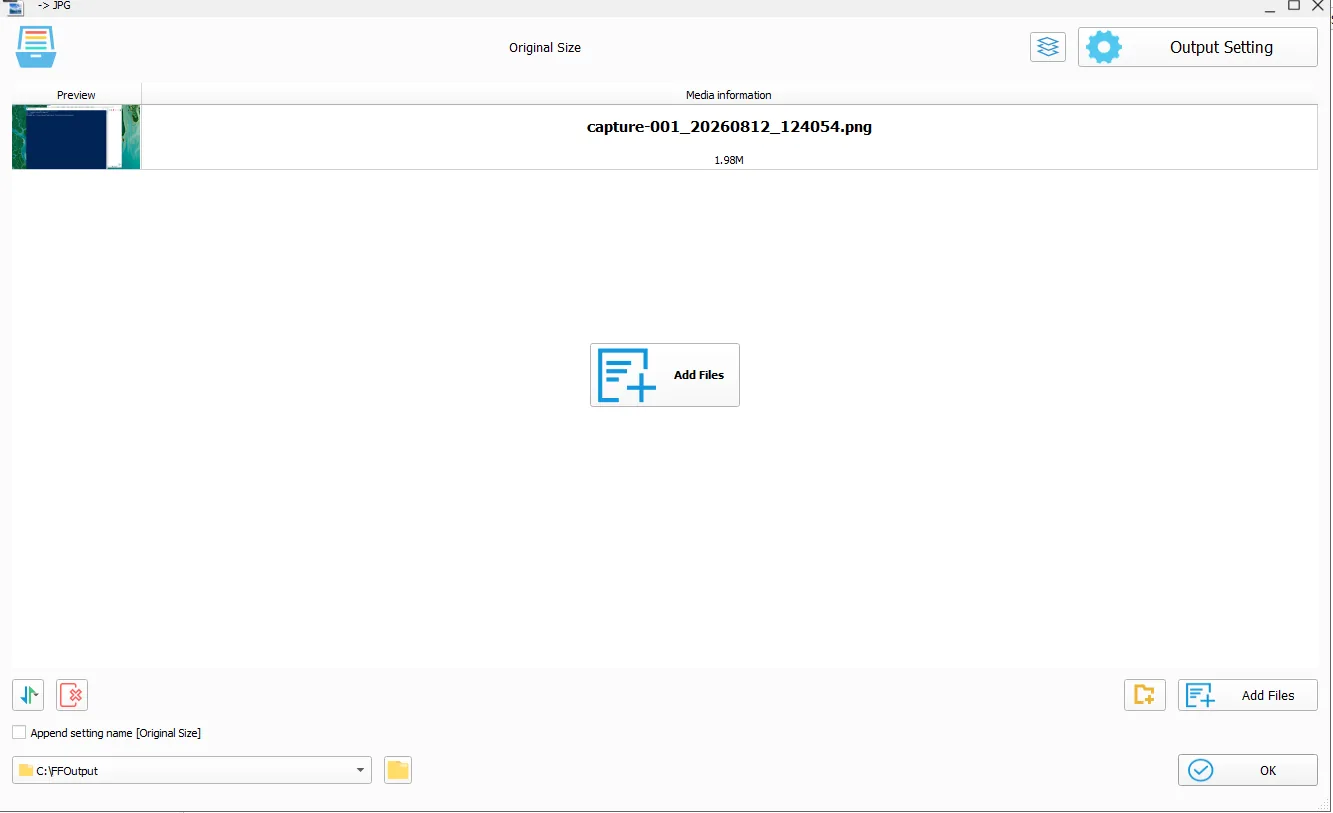
Optionally click "Configurar Destino" to adjust quality, bitrate, resolution, or other output settings before converting.
Choose your output folder if you want something other than the default (C:\FFOutput), then click Start.
Watch the queue status move from "Waiting" to "Completed" — a Windows notification confirms when each task finishes.
In our own test, converting a 1.98 MB PNG screenshot to JPG went from "Waiting" to "Completed" in about a second — a good sense of how fast a simple, single-file conversion actually is once you're through the setup steps above.
Get Format Factory 5.22.0.0
~163 MB, 64-bit Windows only, published by Free Time Software Technology Co., Ltd.. Go to the download page for the official link, the exact byte size to check it against, and a safe-download checklist.
Only 64-bit Windows 7 / 8 / 10 / 11 are supported.
Batch converting multiple files
The same "Add File" step accepts multiple files at once — select a whole folder of photos, or hold Ctrl while clicking several video files, and every one queues up under the same target format. Set your output settings once before starting, since they apply to the whole batch rather than being configured per file. This is the standard way to convert a full folder of iPhone HEIC photos to JPG, or an entire album of CDA tracks to MP3, in one pass.
Where to find more documentation
For features beyond this beginner walkthrough — the editing tools, document conversion, or disc ripping — we've written dedicated pages covering each in the depth this overview doesn't. The developer's own site also hosts help documentation and a changelog you can check directly if you want the primary source rather than our independent write-up.
Common beginner questions
Do I need to know anything technical to use it?
No — the default settings work fine for most everyday conversions without touching a single advanced option. The output settings dialog is there for when you want more control, not as a required step.
Can I cancel a conversion partway through?
The queue interface lets you manage tasks before and during processing — if you need to stop something, look for a stop or remove control in the queue list rather than force-closing the whole application.
What if I pick the wrong output format by mistake?
Nothing is destructive until you click Start — you can remove a file from the queue and re-add it under the correct format button at any point before conversion actually begins.
Understanding the conversion queue
Every file you add sits in a queue with a visible status — "Waiting" before you click Start, then moving through processing to "Completed" once finished. This queue-based design is what makes batch conversion work smoothly: you can keep adding files while earlier ones are still processing, and check back on overall progress at a glance rather than babysitting a single conversion at a time.
The short version
Pick a category, click a format button, add your files, optionally adjust settings, click Start. That six-step pattern is identical whether you're converting one photo or a hundred video files — once it clicks, every other page on this site is really just a deeper dive into one specific version of the same basic workflow.
It's fine to just explore
Nothing about the interface punishes experimentation — clicking through categories and format buttons without converting anything doesn't change any settings or commit to anything. If you're not sure what a specific tool does, the fastest way to find out is usually just clicking it and seeing what opens, rather than searching for documentation first.
You'll be productive within minutes
There's no steep learning curve here — most first-time users complete their first successful conversion within a couple of minutes of opening the app for the first time, based on how straightforward the category-then-format-button pattern is once you see it once.
Bookmark this page for a refresher
If you only convert files occasionally, it's completely normal to forget the exact workflow between uses — this page will still be here the next time you need a refresher rather than needing to rediscover the interface from scratch.